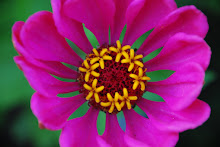
Peony 'Sarah Bernhardt'

Peony 'Sarah Bernhardt'

Saturday, May 16, 2009

Tips for Tomato Planting

It's finally tomato planting time in Portland! (Photo of ME delighted to be planting tomatoes!) I think gardeners get most excited about growing this one vegetable (technically a fruit). There is always "tomato madness" at the nursery every spring. Usually I would plant my tomatoes at the end of May. However today it's 80 degrees and the forecast is for the 2 days in the 80s and the extended forecast has night temps in the 50s the next 7 days, so I'm going for it! And since my soil is in raised beds it is very very warmed up. When I dig down 6 inches it's still literally "steamy" to the touch. Here are some tips I can offer towards tomato growing success:

  • Tomatoes like warm weather. You might be tempted to plant your tomatoes in April when we have a warm spell in Portland, but if you do you are asking for trouble. Tomatoes will be stunted with day or night temps under 50 degrees. Optimal time for planting in Portland is usually May15-the end of May. This is for the planting of "starts" not seeds. Portland does not have a long enough or hot enough summer to facilitate direct seeding tomatoes. If you want to start tomatoes by seed indoors your planting time is mid-February.
  • Tomatoes need FULL sun and lots of it. They will not set fruit in shady areas.
  • Tomatoes are "heavy feeders." Prior to planting amend your soil with compost and organic matter. I recommend Bumper Crop compost, Earthworm Castings & Coir. I work in all of these amendments prior to planting with an organic granular fertilizer, which will slow release to your plants through out the season. I custom blend my own. For a packaged fertilizer I'd recommend Down To Earth brand Vegan Mix or EB Stone brand Tomato & Vegetable fertilizer. At planting time and every other week I water my tomato plants with liquid seaweed. At planting time I also fill the planting hole with earthworm castings.
  • Tomatoes have very long root systems (3-4 feet) and they need plenty of room to grow. Make sure your planting bed is tilled deep enough for the tomato's roots. That also means no shallow containers, if you are growing in a pot. Give the plants plenty of space between each other.
  • Tomatoes don't need a lot of water. I made the mistake of over-watering my tomatoes last year, which caused blossom end rot. By over-watering I mean several times per week. When I consulted with veggie experts they all recommended a deep watering only once a week throughout the growing season. In a previous year, my inconsistent watering routine caused my tomatoes to crack and split open.
  • At planting time I put in the planting hole a spoonful of Rock Phosphate & Lime. These are good sources of calcium to help prevent disease problems tomatoes are prone to. Traditionally people have recommended Bone Meal as a source of calcium for tomatoes. It has 20% calcium and has high amounts of water-soluble phosphorus. However, bone meal is a by-product of the slaughter house industry and I'm not down with that. That's why I switched to Rock Phosphate, which has 19% calcium. It is a great source of both calcium and phosphorus to your plants with long-term availability up to 5 years! So, in conclusion: Rock Phosphate + Lime=good stuff for your tomatoes and no animal buddies killed for your gardening success!
  • Rotate your crops. Do not grow your tomatoes in the same place every year. This will create disease and pest problems. Use a 4 year rotation for all crops!
Here's a step by step guide to planting:


1. Dig a planting hole about 6 inches deep.
2. Drop in a spoonful of rock phosphate & lime.
3. Drop in a scoop of earthworm castings.
4. Place your tomato plant gently in the hole. Plant deep enough to cover the first set of leaves. Tomato plant leaves can sprout roots!
5. Fill in around the plant with earthworm castings.
6. Water in well with liquid seaweed.


7. Provide support (tomato cage) at planting time. Doing this later you run the risk of damaging the plant roots.
8. Tell them how much you love them and then daydream about all the tomatoes you'll harvest in August for fresh eating, saucing, canning....

Mid May Garden Update

It is a beautiful sunshiny May day today. An incredible 80 degrees and sunshine that just won't quit. Usually I would wait until the end of May to plant my heat loving vegetables like tomatoes, eggplants, peppers, and squash. But, the forecast is for day temps in the 80's the next 3 days and the extended forecast has night temps in the 50s for the next 7 days. My soil is super warmed up being in raised beds so I'm going for it! I'll be prepared with my frost blanket just in case the weather takes a turn for the worst next week.

Tomato & Friends Bed: See my other post on tomato tips for planting suggestions. In this bed the slow-poke peas are still not producing and it's time to put the tomatoes in so we just worked around them. We'll see how long I leave them in there if they are taking so long to produce any peas. I planted 5 varieties of tomatoes: green zebra, taxi, oregon spring, yellow pear & sungold. (I also have oregon star & garden peach in a containers.) Along with the tomatoes I planted sweet peppers: orange california wonder, banana, carmen & gypsy. I also planted some eggplant: black beauty, japanese long & listada de gandia. Of course there are also 3 varieties of basil tucked in there: lettuce leaf, genovese & siam queen thai. This bed is companion planted with 'state fair' zinnias and 'cinnamon star' sunflowers.

The Squash Mound: My squash mound is a very fun project I was excited to finally plant in today. In October I sheet mulched a 4'x8' space in the "lawn" (I use the term lawn lightly!). I knew I needed another veggie bed this year and I HATE removing sod to construct beds. So, I experimented for the first time with the sheet mulching technique. Basically you compost in place where you would like to plant 6 months later. I started with a layer of cardboard, which smothers the lawn & weeds and eventually decomposes. I then layered levels of organic material that will decompose and make soil that you can directly plant in. I started with un-composted yard debris, then a layer of un-composted food scraps, then a layer from my compost pile that was about half way composted, then a bag of chicken manure, then a bag of Black Forest compost, then a layer of bark mulch to suppress weed growth on the surface, then a bag of cocoa mulch to keep the neighborhood cats off the pile. Then I let it sit for 6 months. And today when I turned the mound it was the most luscious, soft, loamy, gorgeous soil I've ever planted into. The cardboard on the bottom was totally decomposed. It was amazing. I added my custom vegan fertilizer mix and thoroughly worked in a bag of Bumper Crop compost. Once I planted everything I mulched with a bag of Whitney Farms Garden Mulch. I hope my squash will be so happy in this delicious little mound. It was so warm when I planted--they should just love it! Here's what I planted: 1 zucchini, 1 yellow crookneck squash & 1 sunburst patty pan squash. I space them each about 3 feet apart, added worm compost to their planting holes, and watered in with liquid seaweed. I companion planted with 'rocket red' snapdragons, 'touch of red calendula' and I direct seeded 'bright lights' cosmos and 'starburst lemon aura' sunflowers. Once the calendula & snap dragons are in bloom it's going to look amazing. Here are some before and after planting photos

I'll think I'll wait another week on planting my cucumbers. Or who knows, after my blogging break I might make it back out there for some late afternoon planting! Hope you are all enjoying a blessed & joyful spring in your gardens.

In Health & Happiness,
Miss Jolie Ann

Friday, May 15, 2009

Yogurt Dip with Fresh Tarragon & Chive Blossoms


Hello friends!
I whipped up this dip for tonight's "2nd Suppers at Miss Jolie's" dinner party. This month I wanted to keep it really simple. I started by yesterday going to the East Bank Farmer's Market in SE Portland. I aimed to design tonight's menu around my fresh seasonal purchases. I spent $40 and came home with: garlic chive chevre, 2 bunches baby carrots, 1 florence fennel, 4 leeks, 1 bunch green garlic, 1 bunch spinach, 1 bag of salad mix, 1 bag of basil, 1 bunch beets, 1 bunch raab. Then I added what was fresh from my own garden: lacinato ("dinosaur") kale, tarragon, mauve chives, bronze fennel, and flowers-calendula, violets, marigolds & roses.

The resulting menu
  • Crackers with Chevre & Violets
  • Flower Salad with Baby Greens, Raw Beets & Toasted Pecans
  • Spring Panzanella with Peas, Kale & Spinach
  • Roasted Baby Carrots, Leeks & Fennel with Yogurt Herb Dip
  • Sautee of Raab & Green Garlic with Italian Tofu "Sausage"
  • And to keep it simple, I picked up pre-made dessert from Trader Joe's!
I love this simple to make & beautiful looking dip for it's freshness and many layers of flavor.

In Health,
Miss Jolie Ann


1 cup nonfat plain Greek yogurt
1 tbsp mayonnaise
1 tsp Dijon mustard
1 sprig fresh tarragon
small handful of mauve chives with blossoms
sea salt & black pepper

Mix yogurt, mayo and mustard. Chop half of the tarragon and mix in the dip. Reserve the remainder of tarragon for garnish. Remove blossoms from chives and reserve for garnish. Chop chives and add to dip. Stir dip. Garnish with tarragon, chives & chive blossoms. Serve with crackers, raw or roasted veggies, or really anything you want...

Wednesday, May 6, 2009

Happy May!

First Week of May Garden Update:

May 1: Happy Beltane & May Day!!!!!Today I pulled out the fall-planted cover crops: fava & crimson clover. Which was almost sad because their flowers were beautiful. They did a great job surviving the winter and just exploding in the early spring. They nourished the soil and blocked out weeds. I added them to my new sheet mulching projects. The bed they were planted in is becoming my new perennial bed, which I prepped for planting by amending with black forest compost and my custom vegan fertilizer blend. I pruned the roses which are really leafing out and installed a new wooden trellis for the climbers.

May 2: Oh my!!! This was the crazy little storm that came on suddenly and with much power-the black clouds rolled in, the temperature dropped, the winds picked up and got to 50mph gusts, downpour of rain, and lots and lots of large hail. It was just crazy! I was watching some of my trees literally bend in half and bounce back in the gusts. I watched from the window laughing and in total awe of the power of mother nature. Luckily, all my seedlings and garden babies survived. Unfortunately this storm took the life of one Portland resident when a tree fell on the car he was driving.

May 6: As of today Portland has had 2" of rain in May. That's 2" in 6 days! Fun! Fun! Won't need to water the garden for a while. Really need a break from the rain to mow the lawn though. I scored some free dahlia bulbs from the nursery because they were old and dried up. I'm soaking them in liquid kelp to try and pump them back up. So far they are really plump and juicy, we'll see if they grow when I plant them.

May 8: Today it was a beautiful sunny day and I worked in the garden for 6 hours non-stop. It was heavenly and divine. So peaceful and nourishing of my soul. I planted my new perennial garden with hollyhocks, gladiolus, english daisies (bellis), agastache, artemesia, lots of sunflower seeds, nasturtiums, marigolds and alyssum. I planted a wooden container box with lots of my favorite annuals: bedding dahlias, million bells, creeping zinnia, sweet potato vine, african daisies, purple orach & more. I also planted another flower bed with blue hyacinth vine, morning glories, bells of ireland (my favorite!!!!), black & blue salvia, cerinthe, and sunflowers. I prepped my summer squash bed, which is a 4'x8' area I sheet mulched last October.

I'll post some photos soon.
Happy May, Miss Jolie Ann

Thursday, April 23, 2009

Planting Timing

Dear Friends,

It is a beautiful Spring evening in Portland. Typical Spring weather for us: upper 50's, black clouds, then sunbreaks, then rain, then sunny. All that was missing today was a little hail. Ha-Ha! If you live in Portland you know what I speak of. Right now it's a beautiful blue sky with fluffy white "cotton ball" clouds starting to be streaked with shades of pink. I have the window cracked open and there are birds splashing in the birdbath right outside my home office window. Today I saw butterflies in my yard for the first time this season. My plum trees seemed to have overnight dropped their flower blossoms and leafed out completely green. I mowed my lawn 2 weeks ago and it already needs it again. Seeds are germinating, birds are singing, weeds are growing leaps and bounds. Spring is bliss, all of it.

This month Portland has been blessed with 2 weekends of sunny days and record high temps in the 70's. This type of early warm weather just explodes our "spring-fever-gardening-bug." (And, I'm not talking about a pest!) Enthusiasm, energy, and new found hopefullness of the Spring is a wonderful thing, but if we are to be succesful in the garden we must also temper it with some reality. Sadly folks, April is too early for basil, tomatoes, cucumbers, squash and peppers. (But, don't despair there are LOTS of other crops you CAN plant now). A lesson I learned early on is that every vegetable and herb has it's appropriate timing for planting. I learned this lesson by making lots of mistakes. Not everything goes in the ground at the same time. Each plant has it's own requirements for day length, soil temperature, and day & night air temperatures. There are cool season crops and hot season crops. In Portland we have a long growing season, but have short summers without a prolonged period of warm day & night temps necessary for a lot of heat loving crops to succeed. So, here are my tips for beginners and pro's on timing your veggie garden planting:

1. Plan! Plan! Plan! Educate yourself about what you want to grow and what grows well in your area and climate. Ask questions, talk to other gardeners.
2. Know your average last frost date! In Portland, our average last frost date is April 15th. Keep in mind this is an "average" not a "guarantee." Last year we had frost in Mid May and temps in the 40s conistently through the entire month of May. Watch the weather daily.
3. Plan for succession plantings of your crops rather than all at once. This way you will have an extended harvest and can plant warm season crops in the place you've harvested cool season crops.
4. Keep a gardening journal. This will help you document what works and what doesn't work. Reviewing my gardening journal from the previous year is an essential part of my current year planning.

The two resources that helped me the most when I was started out, and that I continue to use are (keep in mind these are resources specific to where I live):

The Maritime Northwest Gardening Guide produced by Seattle Tilth Fifth Printing 2005
Territorial Seed Company Catalog-get your free copy online at www.territorialseed.com

Also check out the Portland Nursery website for a free veggie planting calendar & veggie care-sheets: http://portlandnursery.com/plants/vegetables.shtml

And here's a quick summary of my garden planting. You'll notice many crops I plant every 2 weeks so that I have a succession of harvests throughout the season:

Late February: direct seed peas, arugula, radishes, scallions. Potato tubers, onion bunches, garlic cloves, raspberry canes & strawberry crowns. Plant seedlings-annual flowers (violets & pansies)
Mid March: direct seed spinach, chard, mustard greens, turnips, radishes, arugula, scallions, parsley.
Early April: direct seed mache, lettuce, carrots, radishes.
Mid April: direct seed beets, carrots, turnips, lettuce, arugula, radish, scallions, spinach, chard, mustard greens. Plant seedlings-kolarabi, florence fennel, annual flowers (alyssum, marigolds, petunias, snapdragons, calendula, lobelia)
Late April: direct seed beets, carrots, turnips, lettuce, radishes, arugula, spinach, chard, sunflowers, scarlett runner beans. Plant seedlings: artichokes, dill, chives, cilantro, tarragon, annual flowers (cosmos)
Mid May: direct seed pole & bush beans, beets, carrots, radishes, lettuce, basil & summer savory.
Late May: direct seed corn, bush beans, beets, carrots, radishes, lettuce. Plant seedlings: tomatoes, zucchini & summer squash, winter squash, pumpkins, basil, annual flowers (zinnia & cosmos)
Early June: Plant seedlings: cucumber, eggplant, peppers, gourds, basil, annual flowers

Happy Planting & Happy Spring!
In Health,
Miss Jolie Ann

Beet Dip


Beet Dip
Recipe from Vegetarian Times Magazine
www.vegetariantimes.com/recipes/8591

Dear Friends,
I made this beet dip for the March edition of "2nd Friday Suppers at Miss Jolie's" and it was a hit! Bright pink color and such an unexpected delicious taste. Creamy, satisfying and you'd never guess the main ingredients were raw beets and raw spinach. For the party, I served it with homemade toasted pita chips and the leftovers were great with "trader joe's organic corn chip dippers." I will make this recipe again and again! Oh yeah, and I doubled this recipe to make enough for my party.

Enjoy,
Miss Jolie Ann

1/2 lb red beets (1 large), peeled and coarsely chopped
1 large scallion, chopped
1/4 cup (packed) chopped fresh spinach
8 oz cream cheese
2 tsp freshly squeezed lemon juice
1/4 tsp salt
2 tsp snipped chives

1. In bowl of a food processor, pulse beets, scallion, and spinach until finely chopped.
2. Add cream cheese, lemon juice and slat. Process until well blended, leaving some texture in dip. Transfer to bowl, and stir in chives.

Lentil Soup for the Crockpot

Lentil Soup for the Crockpot
Original Recipe by Miss Jolie Ann

You know I've been loving my simple crockpot soups this Spring! The ingredients are super economical, the cooking is time-saving, and the product is nutritious and delicious....

In Health,
Miss Jolie Ann

1 leek, washed & thinly sliced
4 garlic cloves, peeled & minced
1 bunch celery (about 6-8 stalks), stalks minced
2 tbsp extra virgin olive oil
1/2 tsp ground nutmeg
1 tsp ground coriander
1/2 tsp dried mustard
1/4 tsp dried tarragon
1/2 tsp dried thyme
1/2 tsp ground cumin
2 cups brown lentils, rinsed & drained
Sea Salt & Black Pepper

1. Over medium heat in a skillet warm the olive oil. Add the leeks, garlic & celery. Saute over medium heat for about 1o minutes until softened and slightly browned. Add spices and saute another few minutes until the mixture is very fragrant and well combined.
2. Place the cooked vegetable & spice mixture into the crockpot with the lentils. Add enough water to cover the ingredients.
3. Cook in crockpot for 6-8 hours until the lentils are completely soft. Add salt & pepper to taste. Taste and adjust seasoning. You may need to add additional amounts of each spice.